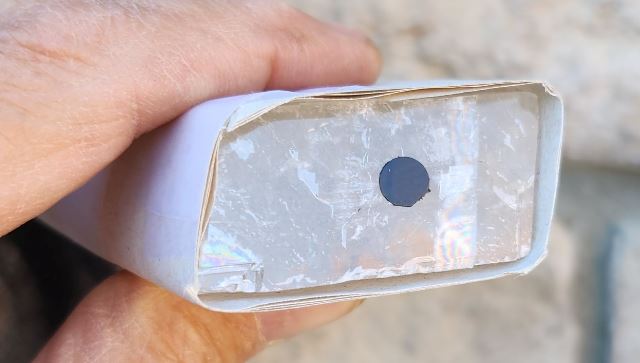
It is believed that the Vikings were able to navigate by locating the position of the Sun on a cloudy day and during the extended twilights of the north. They may have used a Viking Sun Stone. It would indicate East and West during twilight. A Viking Sun Stone was likely a piece of Iceland Spar also known as Optical Calcite or Calcium Carbonate. Optical Calcite has the beneficial property of being fairly clear and also is birefringent. This means that light coming into the crystal will become polarized. The light is split into two rays and will exit the crystal in two different spots. If you hold a crystal over an image or text you will see double.
Iceland Spar can be purchased on the internet at a reasonable price. Be warned though, some people have received stones that were too small or had fractures in the crystal that prevented them from achieving success. Also, be warned that the internet has some bad advice on how to use them. Here are our instructions on how to use them:
1. You will be looking through the long direction across the crystal. Any axis will work, but the longer the crystal, the larger the distance of the birefringence. Ideally, a 1-inch, by 1-inch, by 2-inch would be great.
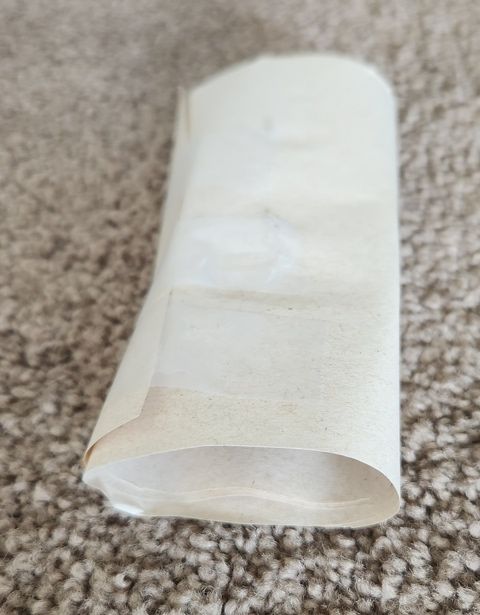
2. Wrap the stone in black opaque paper leaving the two ends (in the long dimension) uncovered.
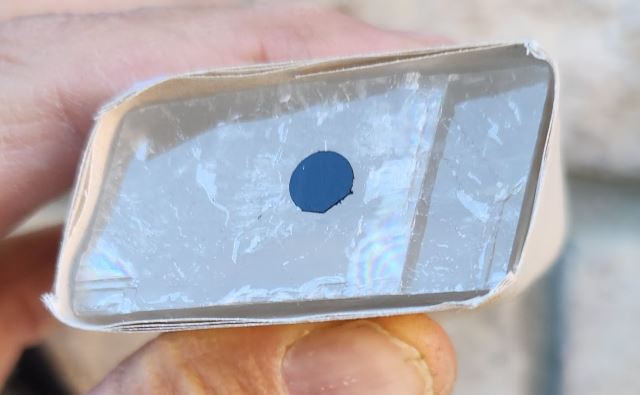
3. Make a small black dot out of an opaque material and glue it to the exposed end of the crystal. This can be done using a glue-like rubber cement or silicon sealant that can be removed easily and is not permanent.
4. When you look at the daytime sky through the crystal, you will see two images of the black dot. One is the actual dot, and one is the birefringence-caused image of the dot. Depending on the length of the crystal, the dots will overlap in different amounts. One dot is usually brighter than the other.
5. Rotate the stone so that the two dots are horizontal (see image below).
6. Do not point the stone at the sun, but scan across the sky above the horizon. When the two images are the same darkness you are directly below and are pointing in the direction of the sun. It is a subtle effect and takes some practice to see it.
7. If there are no clouds, then the light from the sun is often too intense. Multiple sheets of white tissue paper will work well as simulated clouds. They should be held over the end of the stone that has the black dot.
Now for the test. On a cloudy day (or use the white tissue paper to simulate clouds), try to locate the sun using your Sun Stone. Try this at three times during the day: noon, mid-afternoon, and in early evening twilight after sunset. Measure the Azimuths indicated with a compass. Also, make three measurements each time and calculate an average Azimuth. Compare your Azimuth estimates with actual data from the internet or from planetarium software.
I included the following two pictures to supplement this web page with another option to purchase a sun stone.
Another name for the Icelandic Spar crystal.
Building My Sun Stone Viewer
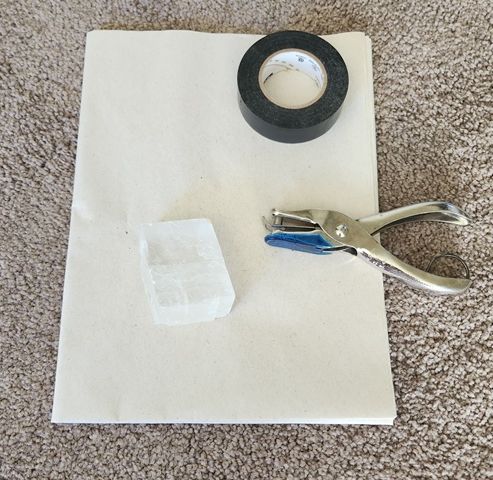
I purchased this piece of Icelandic Spar from Amazon.
I used the paper hole punch and black electrician's tape to make the black dot on the end of the crystal.
How did your Sun Stone do?
On Thursday, Oct. 24, 2024, there was a cloud over the sun about 10 am. I could see where the sun was behind the cloud, so I took my Sun Stone out and moved it left and right along the hosizon, under this cloud, that was covering the sun. To my amazement, I think the thing works.
The quality of my Iclandic Spar is not that translucent. The faces are not squared off, but have a slight angle to them. The Stone was not polished. I think these things makes it more difficult to use.
Despite this, when the Sun Stone was under the sun, I could tell there was an extremely faint, birefringence-caused image of the dot that appeared, very close to the black dot on the front, at an angle of maybe 45 degrees to the lower left of the front black dot. When I panned the Sun Stone left and right, the faint, birefringence-caused image of the dot would appear when I was under the sun and disappear as I moved the Sun Stone away from the sun. Amazing.
Next week, we have rain in the forecast. I will take the Sun Stone out and try it again.
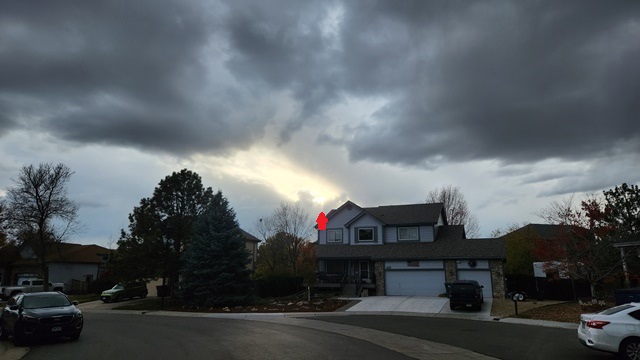
On Sunday Nov. 3, 2024, a winter storm is approaching my home. It is predicted that we will have 3-6 inches of snow on the ground in the morning,
The sun is in the area of the red arrow. This is looking southwest and my home is almost in the center of this picture.
I moved my sun stone below the sun, but found the light through the stone dimmed significantly when I was in the tree to the left and my house on the right.
When I elevated the sun stone to move it along the line of darker clouds over the area of where the sun is, something remarkable happened.
I had my stone positioned with the black dot on the face on the right side of center. When I slowly moved the stone left and right, with the length of travel centered over where the sun is, I could see the image of the black dot dim, then get brightest when over the sun and dim again when it was on the other side of the travel. I did this many times and the dimming and brightening was barely there, but I could convince myself that there was a difference when the Stone was away from the sun as compared to when it was over the sun.
The black dot was not round nor clearly seen through the Sun Stone. It was more like a shadow on the right side of the stone. I watched this black dot shadow dim and brighten as I moved the Stone left and right.
I think that if I had a move perfectly manufactured Icelandic Spar stone, with parallel, polished faces on the front and back, that this effect might be more pronounced.
In summary, I think I convinced myself that my Sun Stone, purchased from Amazon, did detect where the sun was with respect to the horizon.
If I were on a ship at sea, with nothing to block the horizon like trees and houses, this Sun Stone would be easier to use to detect the azimuth of the sun.


