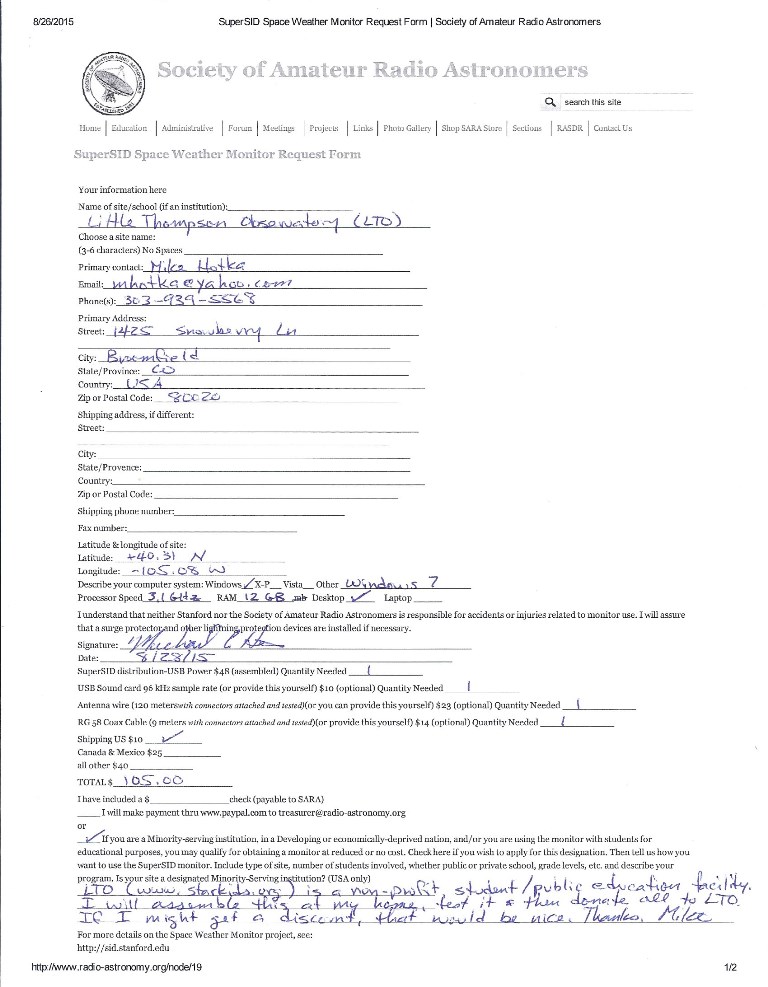
I went to the Astronomical League's website and read all the information about building a SuperSID system and making observations. There was a reference to the Solar Center at Stanford University. There it referenced that a kit was available with all the components to make a SuperSID antenna and update a PC to receive and process signals from the antenna. It also referenced that this kit might be obtained for free, so I applied for the kit for the Little Thompson Observatory. The application I filled out can be found here. We received the kit at no charge.
Building the Antenna
The instructions I used to assemble the antenna can be found here.
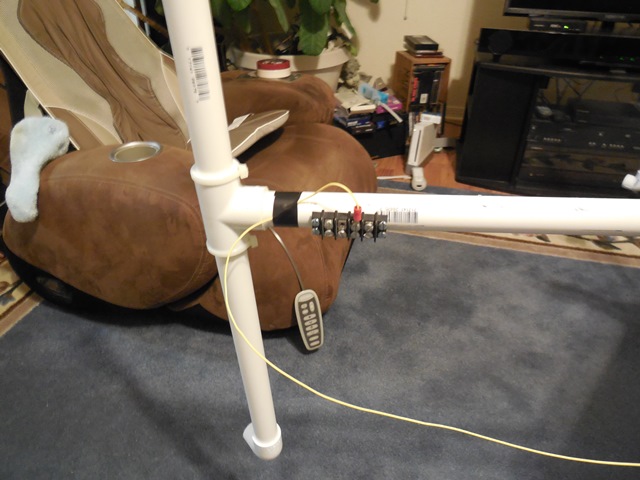
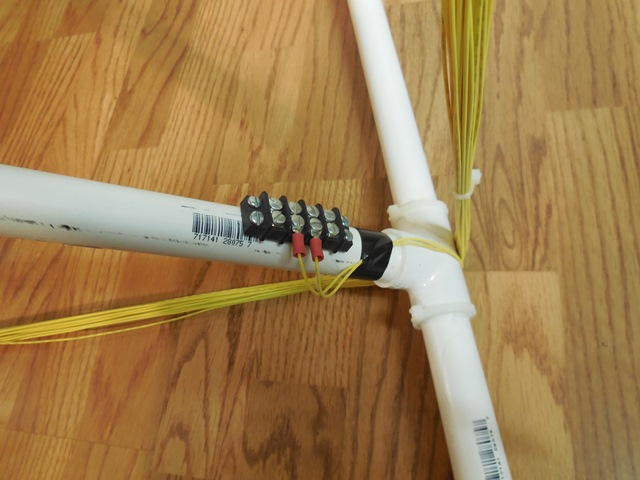
To build the frame for the antenna, the instructions said to use 1" PVC pipe. To reduce the cost of the PCV pipe and fittings, I used 3/4" pipe. This is OK, but the antenna wire, provided in the kit, was a bit too long when I made the final wrap around the frame and I had to double it back to make it reach the terminal block I used to connect the antenna elements to the coaxial cable. I feel that if I had used 1" fittings, there would not have been any double back of the antenna wire.
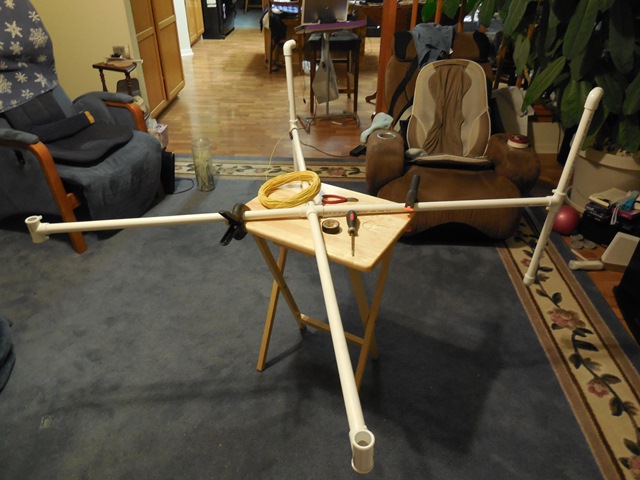
This picture shows the intial assembly of the antenna, with the package I received from Stanford University with all the components of the SuoperSID system. I didn't use PVC pipe glue and welded the fittings together with silicon caulk. I had intended for this to be an indoors antenna only.
I completed the frame of the antenna. Since this was an indoors antenna only, I didn't plug the ends of the PVC pipe to keep water and insects out of the inside of the pipe. An outdoor antenna would need this capped.
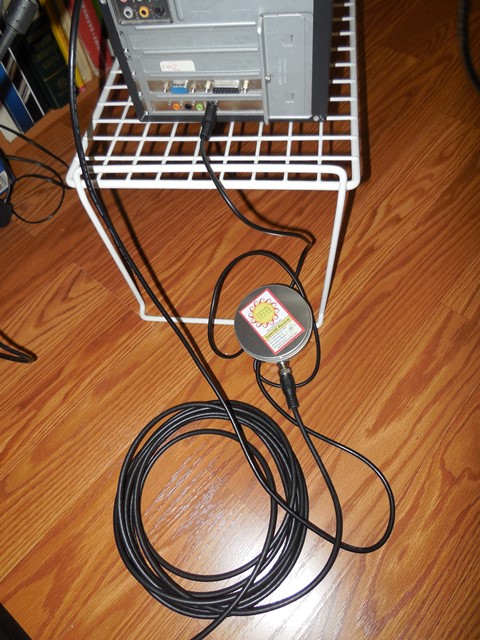
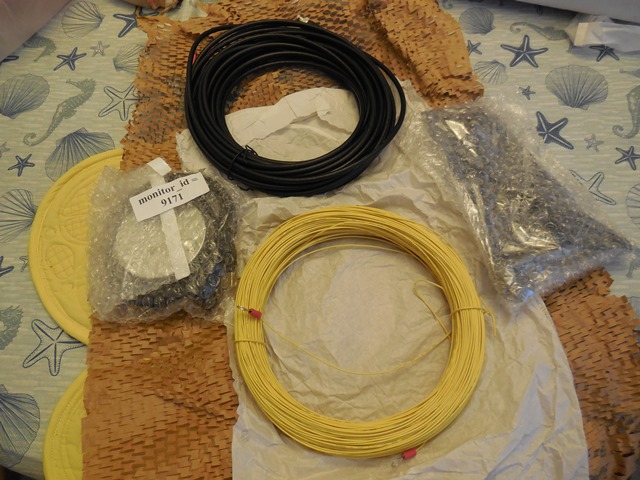
The contents of the kit I received from Stanford University. It has the unique monitor ID with the SID amplifier, a HD sound card, the black coaxial cable and the yellow antenna wire. The ends of both the coaxial cable and antenna wire already had the proper wire connection ends attached.
I decided not to use a spinning lazy susan type of device to aid me in the wrapping of the antenna wire around the frame. I decided to clamp the frame to a TV tray and walk around it to wrap the wire to the frame. The instructions said about 25 complete turns so I didn't have to walk too much.
I attached a terminal block to the frame and attached an end of the yellow antenna wire to it. I just picked a free end and attached it. As I started to wind the wire around the frame, I noticed the wire was feeding from the inside of the loop of yellow wire. I didn't give it much thought at that point, for it was unwinding nicely and I made revolution after revolution around the frame.
After about 10 complete revolutions, the wire got caught up and didn't unwind from the inside of the roll nicely anymore. In hindsight, I should have attached the end of the antenna wire that was on the OUTSIDE of the loop of wire. This would have unwound itself nicely.
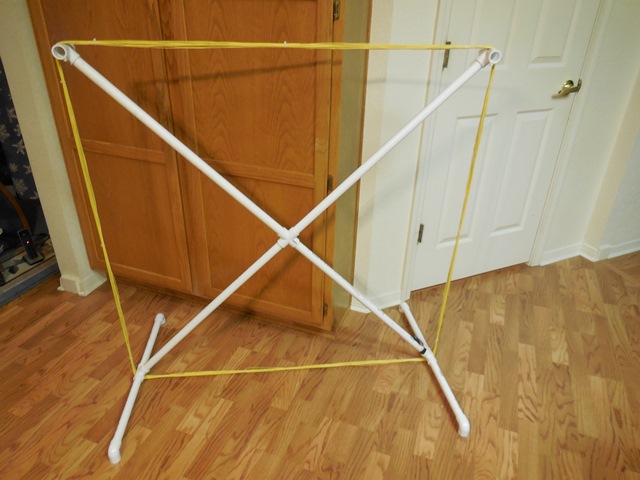
But I did get the antenna wound properly. In using 3/4" fittings, the last bit of wire was too long to just stop at the termina block. I took it half way along the bottom and then doubled it back on itself to make it properly reach the terminal block. If I had used 1" fittings, I think the length of the wire would have stopped at the terminal block on the last wrap of the wire.
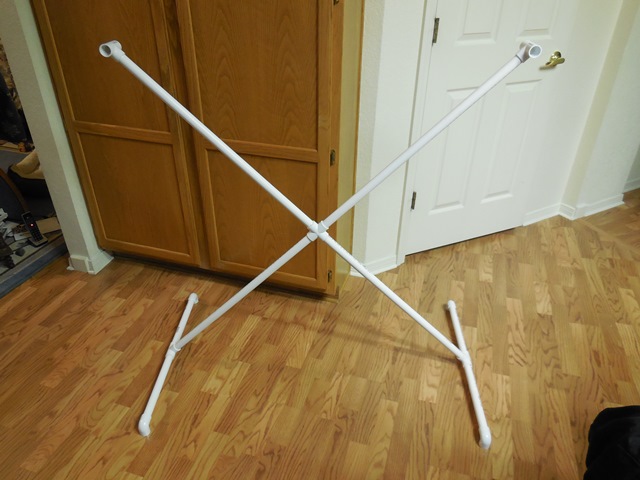
The completed antenna, ready to move from my kitchen in Broomfield, CO, to the Little Thompson Observatory in Berthoud, CO. I am hoping it will fit into my Prius to get it there.
At this point, I read the instruction manual on how to install the software, sound card and other aspects of the final installation of the SuperSID system. I read that the antenna might not work inside a metal building, which the Little Thompson Observatory is. I will try it and see what happens. I suspect that I will need to have the antenna outside a door and have the coaxial cable reach the computer from there.
I am already thinking of making an outdoor antenna. Once I do this, I will use 1" PVC and rewind the yellow antenna wire from this indoor antenna onto the outdoor antenna. This will then allow 24/7 operations of monitoring the Sun for flares impacting our Ionosphere. The indoor antenna might not allow for this 24/7 operation. BUT, I will use the indoor antenna to get the SuperSID system working and recording data while the antenna is outside the observatory.
Testing The System
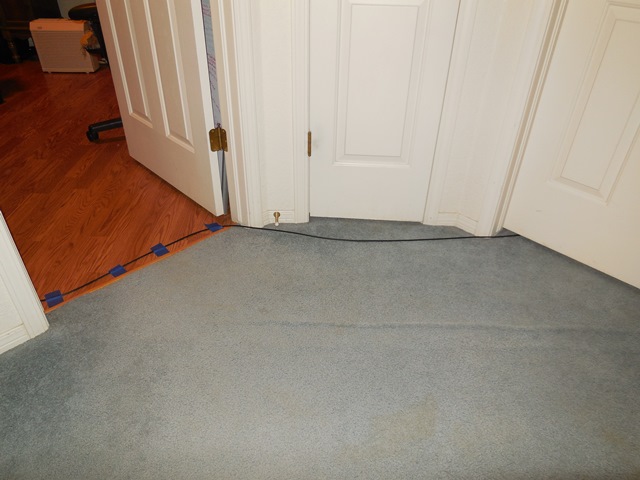
I installed all the software and sound card provided in the SID Kit into a Windows XP computer I had at home. Since I live in a wood framed house, I can run the system from the upstairs bedrooms. I put the antenna in the right bedroom
and ran the coaxial cable into the left bedroom and connected it to the computer's soundcard provided in the SID kit
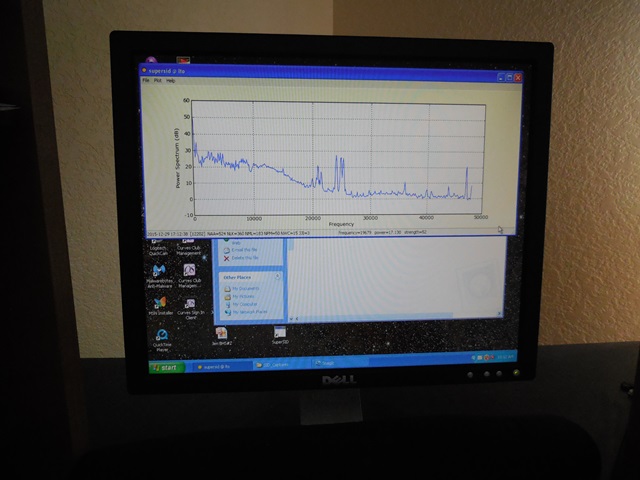
I configured the configuration file with values specified in the instructions and started the SID .exe program Sunday night. The display on the monitor resembles
The VLF Radio stations that are being monitored are shown on this image captured after the Sun set on Monday December 28, 2015
There are 7 or 8 transmitters shown by the tall spikes. A list of stations can be found here. From left to right, the first spike is NWC, Australia (frequecy 19.8), next is NPM, Lualualei, HI (frequecy 21.4), HWV, LeBlanc, NATO (frequecy 21.75), NAA, Cutler, ME (frequecy 24.9), NLK, Jim Creek, WA (frequecy 24.8) and NML, LaMoure, ND (frequecy 25.2) (double peaks together), and the last two peeks (at frequencies 43.9 and 47.0) are unknown (not listed on the SID documentation).
On December, 28, 2015, the big sunspot AR2473 erupted and produced an M1.9-class solar flare, a minor radio blackout in the southern hemisphere, and a coronal mass ejection (CME) that appears to be heading directly for Earth.


