Astrolabes were designed to be hand held and as a result had to be fairly small. The small size limited their precision. An astronomical quadrant or sector could be made much larger. Tyco Brahe was said to have had one that was said to have been 2 meters tall that supposedly allowed measurements in the sub-arcsecond range.
Some quadrants were fixed mounted on walls and as such that they were usually aligned north-south. This enabled them to measure objects only as they transited the meridian. Others were able to rotate, and it was possible to read the azimuth (heading) too. The second type had to have the azimuth scale aligned to the north pole prior to use. The alignment was possibly done by the same methods you used to find north above.
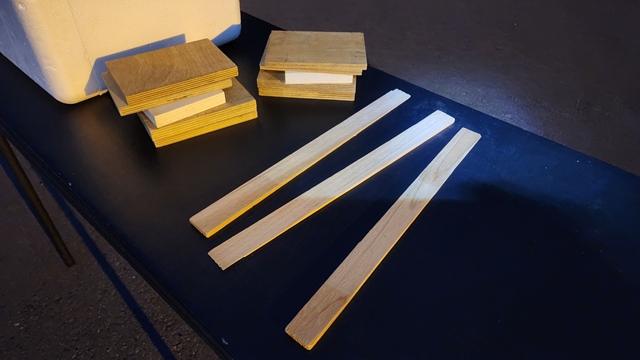
Construct an astronomical quadrant. It doesn’t have to be as large as the one in the picture but try to make it at least one foot on a side so it is significantly larger than your astrolabe. It should be noted that an astrolabe is self leveling while a quadrant is not. Make sure to level your quadrant prior to using it.
Here are the instructions of the quadrant I plan to build.
Here are pictures of the construction of my quadrant.
I used this 2024 Sky Gazer's Almanac to monitor when the planets would be in a good viewing position to complete recording of values for Item 3 below.
Practice using your quadrant by measuring:
1. the height of Polaris
2. the elevation of a few bright stars as they cross the meridian at night (transit)
3. the altitude and azimuth of the moon and planets.Record the dates and times along with your observations.
Click on pictures below for a larger image.
I was planning on going out Sunday Feb 4, 2024 to capture the four Orion navigation stars transiting. The night before, we got 6 inches of wet snow.

I scooped out the area of snow, south of the streetlight so I could setup there tonight. I need to be south of the streetlight, which is in front of the white truck in the picture above, so the light doesn't illuminate the end of my site tube and I can see the second magnitude stars of Orion tonight.
By the time I am ready to observe the transiting stars about 8 pm, this area will be dry.

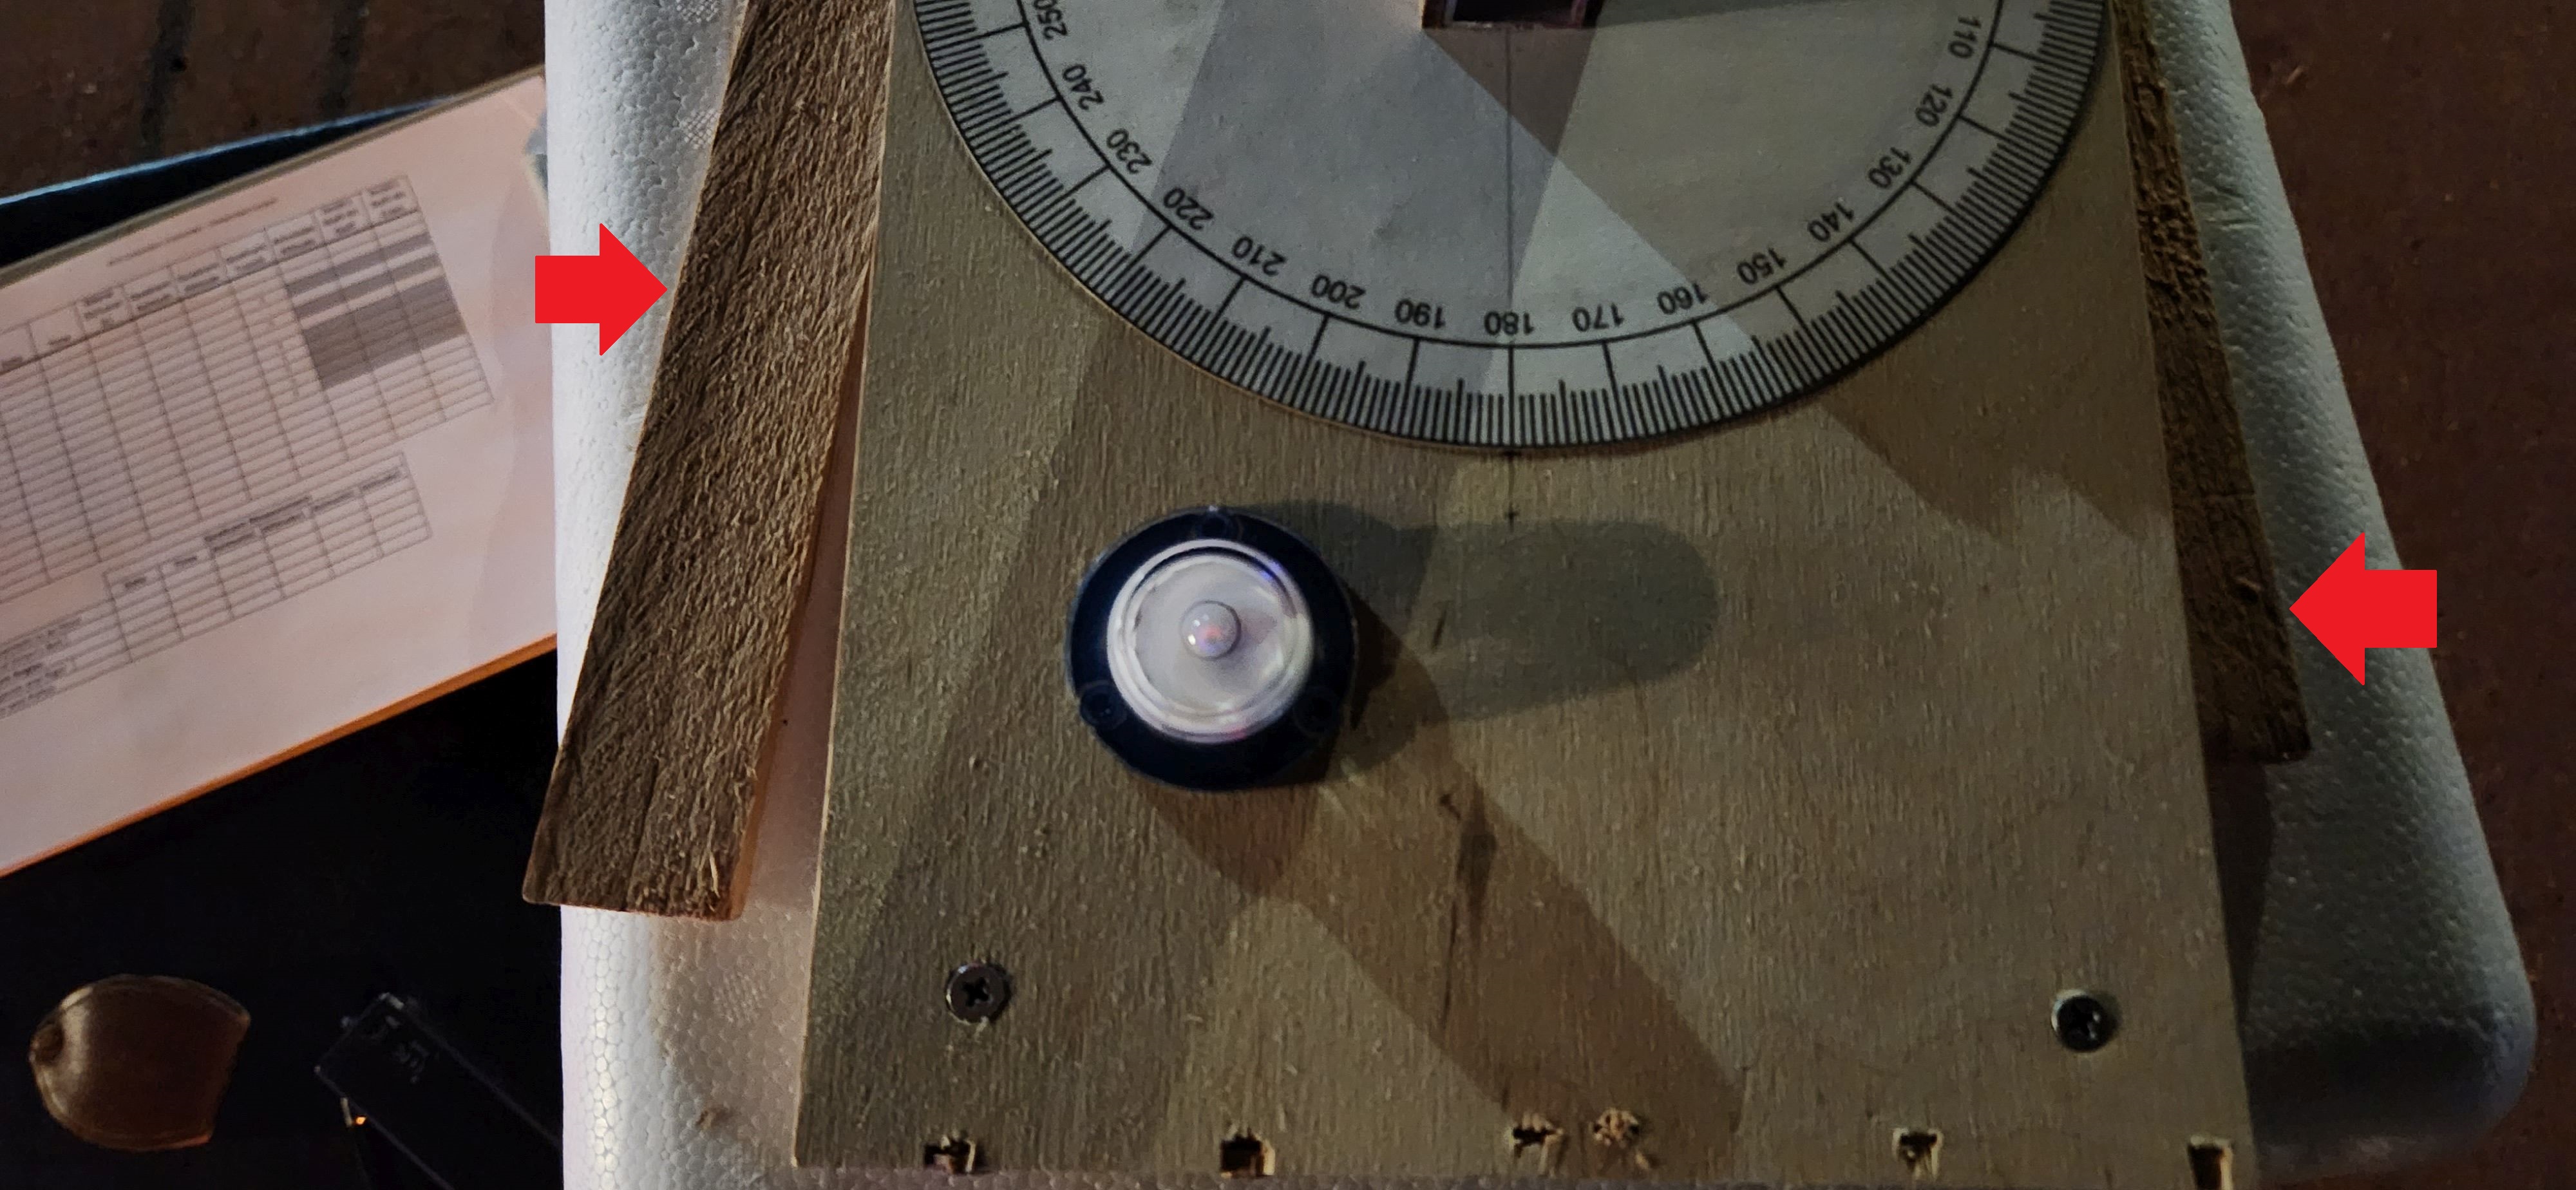
This is how I leveled the quadrant to get accurate readings. I had plywood blocks of thicknesses from 1/4-inch to 3/4-inch thick to level the black table I used. I used wooden wedged door shims to fine level the quadrant itself.
The red arrows point at two of the wooden door shims I used to do the final leveling of the quadrant itself. The 4 wooden feet I put under the azimuth deck were very useful when I slid the door shims under them to easily get this final alignment, as seen on the bubble level.
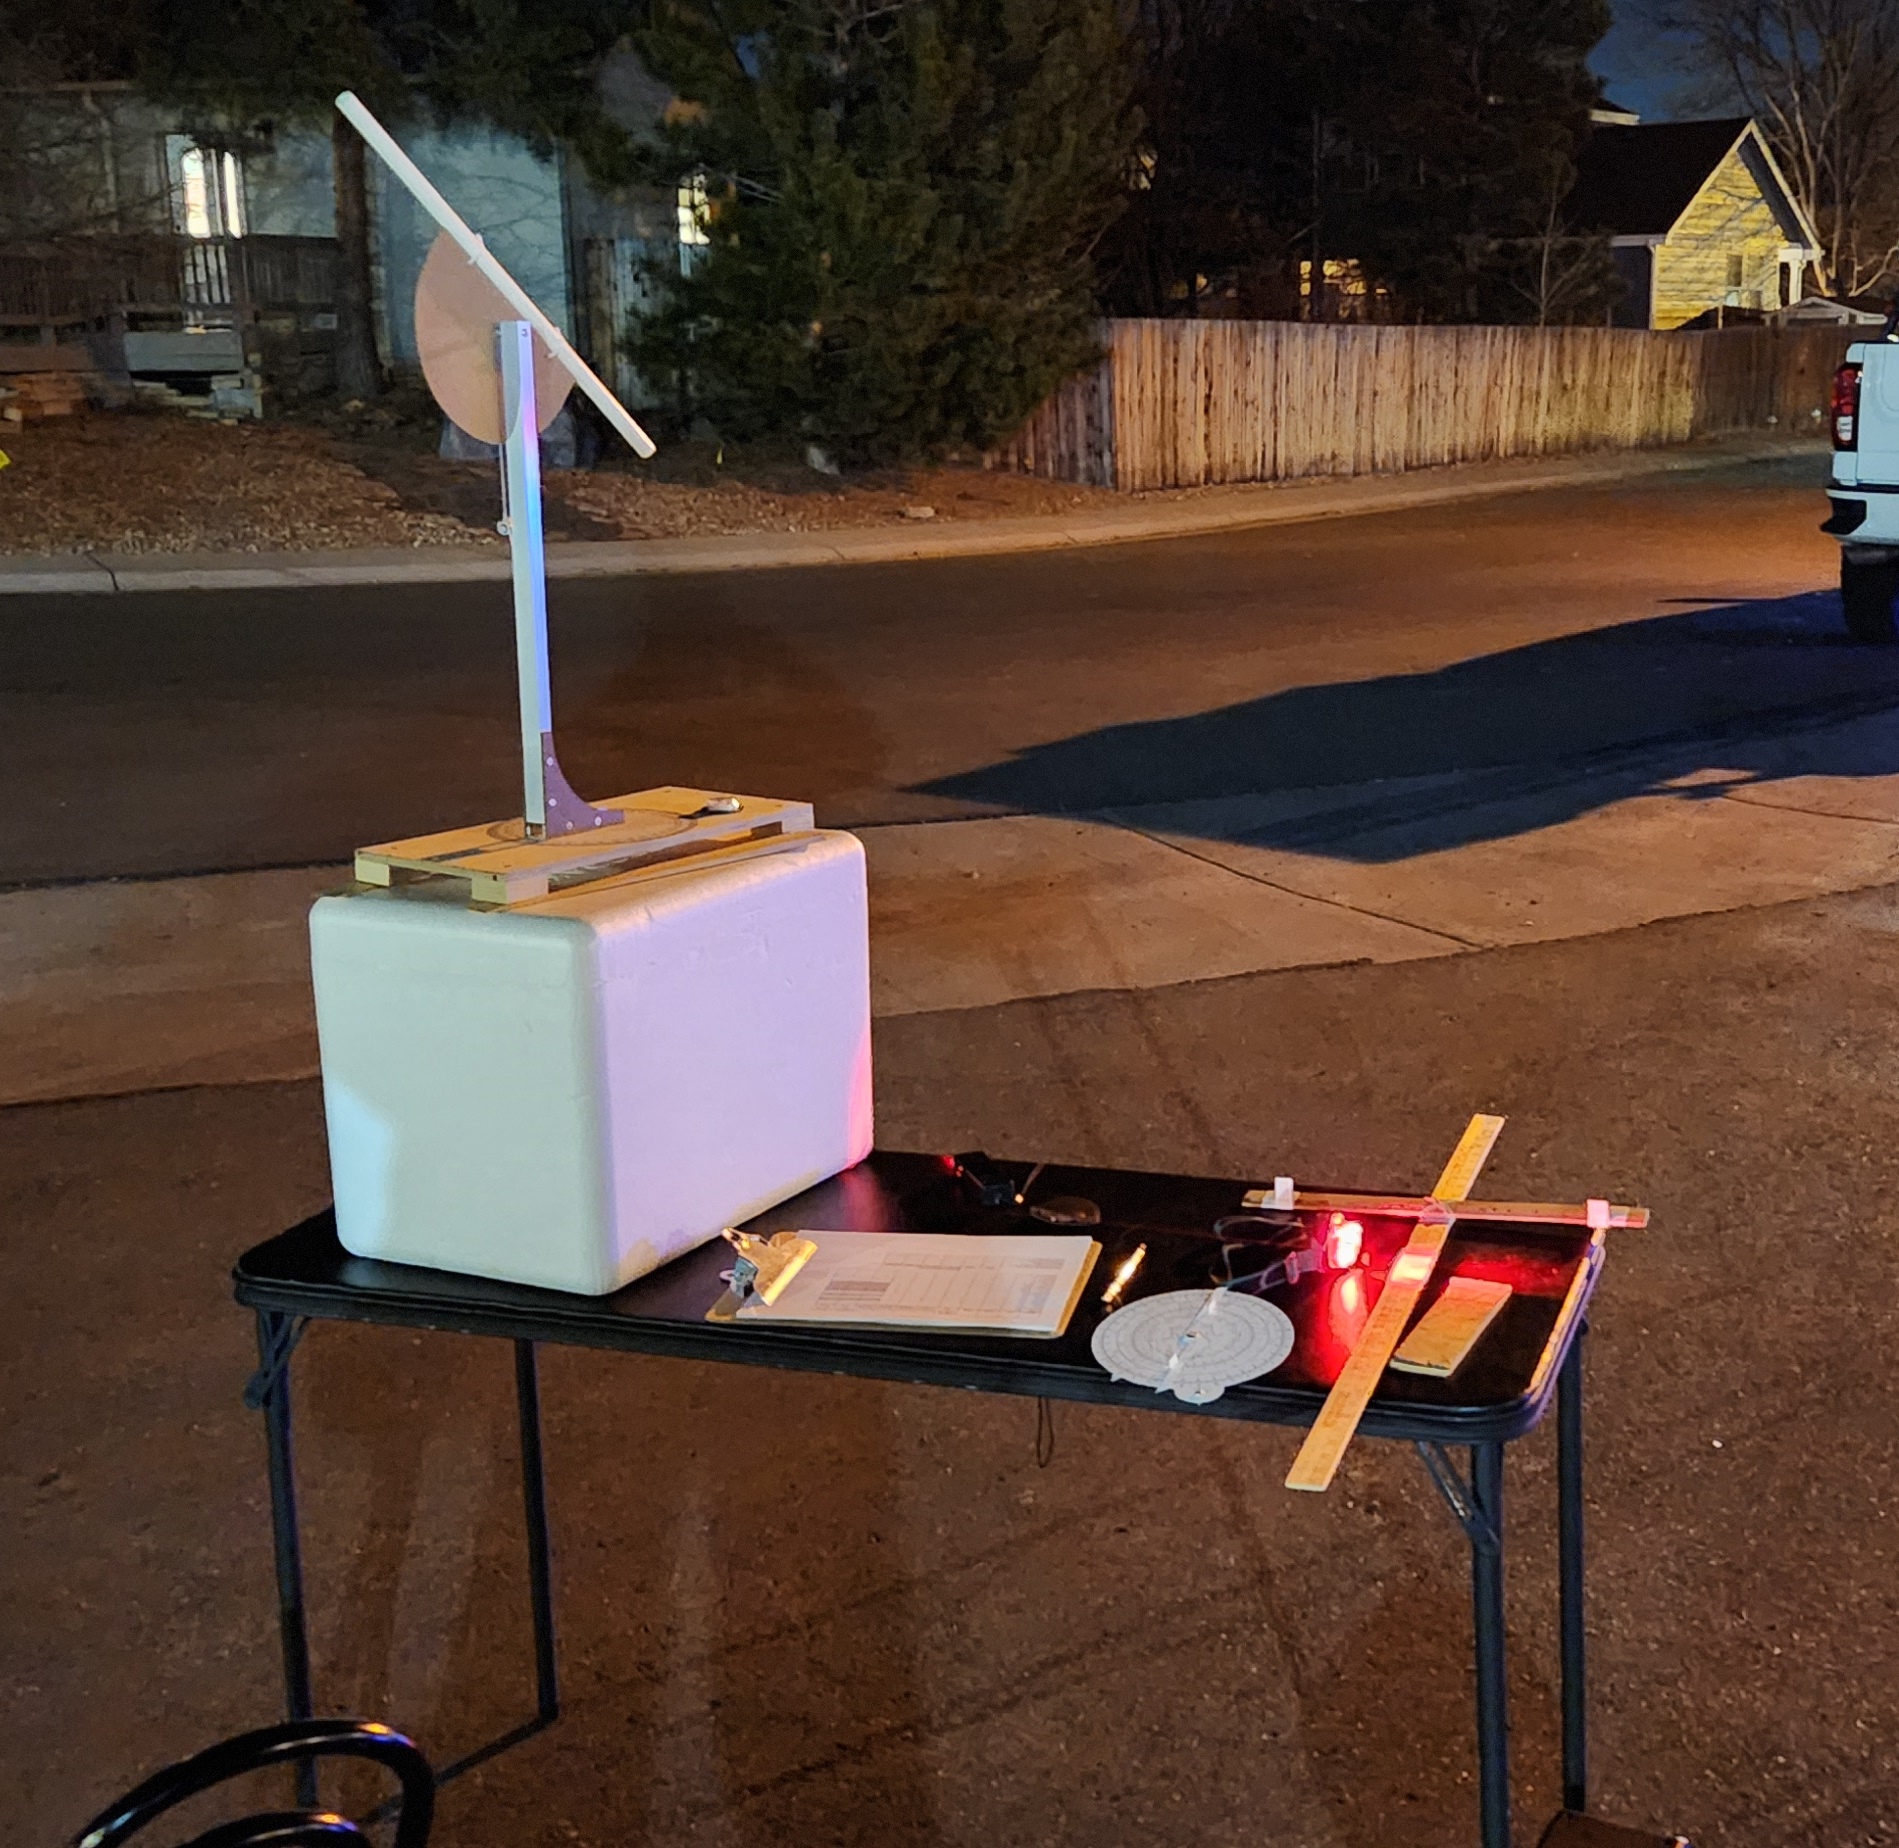
When the quadrant was level, I would align the azimuth reading to 0° North. I would then look through the site tube and align the site tube on Polaris. If I had to rotate the entire quadrant East or West to have Polaris centered in the site tube, I would rotate the base of the quadrant only. Once Polaris was centered, I would check the bubble level once again to ensure it is still level. At this point, the quadrant was aligned with the celestial pole.
When I would rotate the quadrant in the azimuth direction to an object, I made sure that I only rotated the vertical part of the quadrant with the site tube and not the base of the quadrant also. If I felt I accidently moved the base, which sometimes happened, I would return the vertical part to the 0° azimuth reading and re-center Polaris in the site tube.
I created and printed an Excel spreadsheet that I could capture my reading on. This can be seen to the left of the quadrant on the black table.
To get the quadrant to a useful level, I used a styrofoam box. I put this between the quadrant and the black table. This was very useful when the objects I was measuring were high in the sky. I could easily get my head and eye in a comfortable position to make a reading of the objects.
On this night, I was making a reading of celestial objects with my quadrant, astrolabe and Jacob's Staff. These latter two instruments are seen on the black table. Also seen is my clipboard with my recording paper of the objects I would capture this night.
Practice using your quadrant by measuring:
1) the height of Polaris,
2) the elevation of a few bright stars as they cross the meridian at night (transit),
3) and by measuring the altitude and azimuth of the moon and planets.
Record the dates and times along with your observations.
Items 1 & 2:
Compare the use and results from your work with an astrolabe and quadrant.
Do you have a preference?
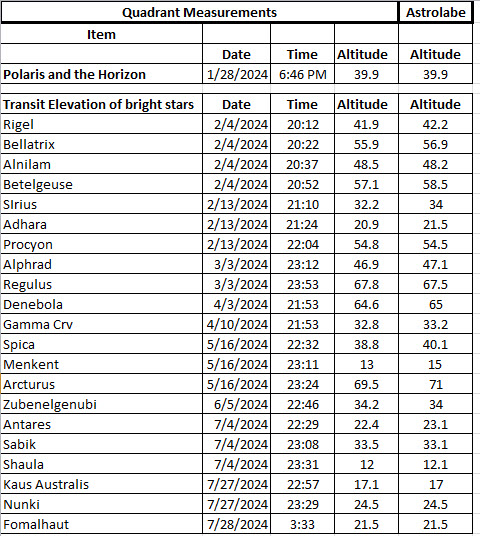
I found using the Astrolabe easier than setting up the quadrant, aligning it and then making readings of the azimuth and altitude scales in the dark. As can be seen in the table above, the Astrolabe was quite accurate when compared to my quadrant altitude readings.
Does one seem easier to use?
I liked using the Astrolabe. It is very accurate and simple to use. I did need a red headlamp to light up the two pointers in the dark. But that was easy to do and in a few seconds, I had the pointers aligned on the stars.
Does one give better data?
Both the Astrolabe and Quadrant gave very similar readings.
It is interesting to know that Kepler used data from one of Brahe’s quadrants to get the data to verify his three laws of planetary motion.
I built my quadrant with a 12" long piece of 1/2" PVC tubing. I found that there was some variation in where the star was centered in the tube, depending where my eye was positioned at the bottom end of the tube. I found that with care, I could center the stars/planets with consistent accuracy.
If I were to do this Program again, I would increase the size of my quadrant significantly. I would also use a board with a V-channel in it so that aligning the quadrant on a target would remove the need to have your eye in a certain position. I would sight up the groove and my eye would always be in the correct position.
Items 3:
The way I converted from the horizontal coordinates of azimuth and altitude to equatorial coordinates of RA and Dec was to use Stellarium's conversion interface.
I started Stellarium on my PC. When the program was fully running, I moved the mouse cursor to the left hand side of the screen. There a menu appears and I selected the first icon, the Location window. I used the search interface to find Broomfield, Colorado, USA as my location and made this the default location.
To convert the quadrant coordinates to RA and Dec, I did the following:
- Stop Stellarium's current time from advancing. Move the mouse cursor to the bottom of the screen and a menu appears. Click the fourth icon from the left to change the solid arrow head to two vertical lines. You will notice the time on this part of the screen stops incrementing.
- Move the mouse cursor to the left hand side of the screen until a menu appears. Click the second icon from the top, the Date/time window. Enter the date and time of your observation you want to convert.
- Move the mouse cursor to the left hand side of the screen until a menu appears. Click the fourth icon from the top, the Search window. In the Position tab, change the Coordinate System to Horizontal.
- Enter your azimuth and altitude readings you took with your quadrant.
- In the Position tab, change the Coordinate System to Equatorial.
- Read the RA and Dec values and put them into the results spreadsheet for this observation.


